
How to Make Kimchi at Home: A Complete Beginner’s Guide
How to make Kimchi at home
This post contains affiliate links. If you purchase through my links, I earn a small commission at no extra cost to you. Thank you for supporting Simple Root Life!
Kimchi is one of the most celebrated fermented foods in the world — and for good reason. It’s bold, tangy, spicy, and absolutely packed with probiotics that your gut will thank you for. The best part? Making it at home is far easier than most people think.
If you’ve ever stood in front of a jar of kimchi at the grocery store wondering what exactly is in it and whether you could make it yourself — this guide is for you. I’ll walk you through everything: what kimchi actually is, why it’s so incredibly good for you, what you need to make it, and a simple step-by-step recipe for your very first batch.
Let’s get into it.
New to fermentation? Before diving into kimchi, you might want to read my Beginner’s Guide to Lacto-Fermentation — it covers everything you need to know about the process that makes kimchi so incredibly good for you.
What Is Kimchi?
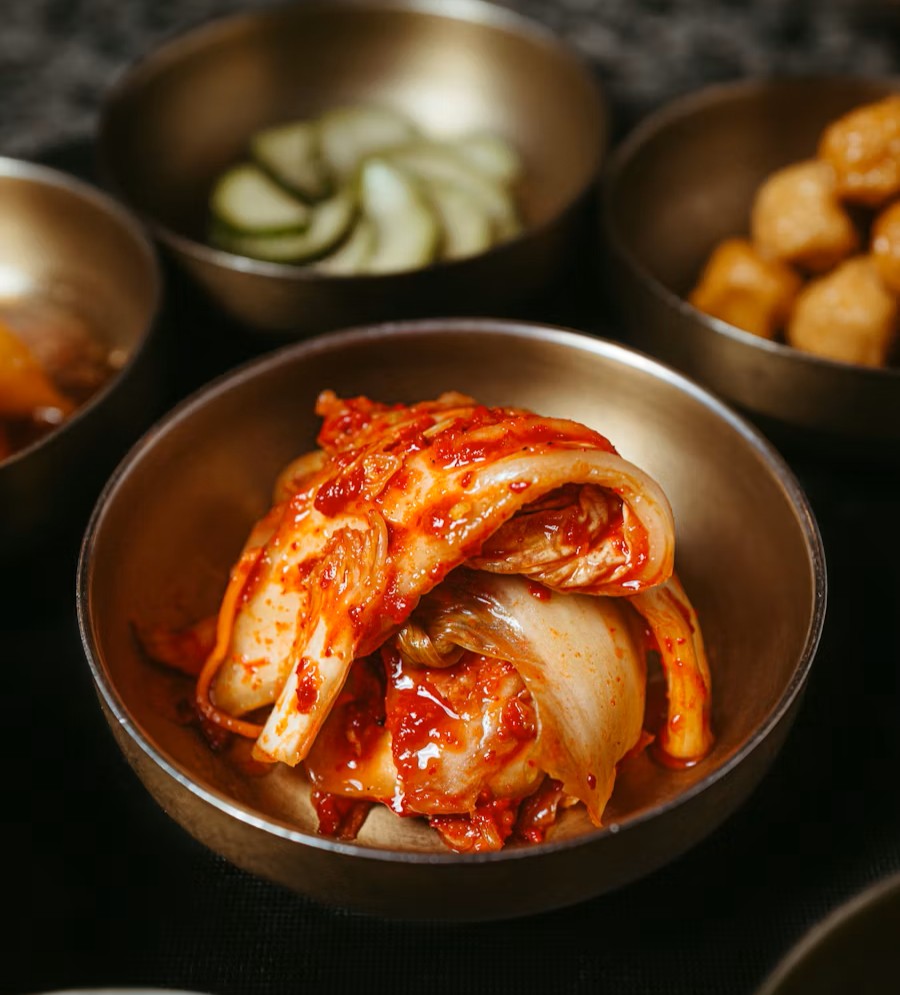
Kimchi is a traditional Korean fermented vegetable dish, most commonly made with napa cabbage and a spicy paste of Korean chili flakes (gochugaru), garlic, ginger, and fish sauce or salted shrimp. It’s been a staple of Korean cuisine for thousands of years — originally developed as a way to preserve vegetables through harsh winters.
Today, kimchi is recognized worldwide not just for its incredible flavor but for its powerful health benefits. There are actually hundreds of regional varieties of kimchi in Korea, but the classic napa cabbage version (baechu kimchi) is what most people know and love.
Why Is Kimchi So Good for You?
According to research published by the National Institutes of Health, regular consumption of fermented foods significantly increases gut microbiome diversity.
Probiotics in abundance Kimchi is teeming with Lactobacillus bacteria — the same beneficial bacteria found in yogurt and other fermented foods. These probiotics support a healthy gut microbiome, improve digestion, and strengthen your immune system.
Rich in vitamins and antioxidants Napa cabbage is already nutritious, but fermentation actually increases the bioavailability of vitamins C, B1, and B2. The garlic and ginger add powerful anti-inflammatory and antioxidant compounds.
Supports gut health and immunity About 70% of your immune system lives in your gut. Eating probiotic-rich foods like kimchi regularly is one of the most effective ways to support both digestion and overall immunity.
Anti-inflammatory properties Gochugaru (Korean chili flakes) contains capsaicin, a compound with well-documented anti-inflammatory effects. Combined with garlic and ginger, kimchi is a genuinely powerful anti-inflammatory food.
Low in calories, high in nutrition A small serving of kimchi delivers enormous nutritional value for very few calories — making it one of the most nutrient-dense foods you can add to your diet.
What Equipment Do You Need?
The great news is that you don’t need much to make your first batch of kimchi.
The Basics
- A large mixing bowl
- Rubber gloves (the chili paste stains everything!)
- A sharp knife and cutting board
- A container to ferment and store your kimchi
The Best Container for Kimchi
This is where it’s worth investing a little. Traditional Korean households use large ceramic pots called onggi — but for home fermenters, a purpose-built kimchi container makes the whole process so much easier.
The E-Jen Premium Kimchi Container with Inner Vacuum Lid (0.9 gal / 3.4L) is hands down the best option for home kimchi makers. It uses an adjustable inner pressing plate that creates a vacuum seal — keeping your kimchi submerged and anaerobic without fussing with weights or plastic bags. It’s also odor-proof, which matters a lot when you have fermenting kimchi in your fridge.
If you’re just starting out with a smaller batch, the E-Jen 1.7L Starter Size is perfect — compact, lightweight, and incredibly easy to use.
Want to skip gathering ingredients separately for your very first batch? The Mama O’s DIY Kimchi Making Kit includes everything you need except the cabbage — the paste, instructions, and all the hard-to-find ingredients. It’s a fantastic way to make authentic kimchi on your first try.
Ingredients for Classic Napa Cabbage Kimchi
Makes approximately 1 quart (enough to fill one jar)
For the cabbage:
- 1 medium head napa cabbage (about 2 lbs / 900g)
- ¼ cup non-iodized sea salt or kosher salt
For the kimchi paste:
- 1 tablespoon fish sauce (or soy sauce for vegan kimchi)
- 1 teaspoon sugar
- 3 cloves garlic, minced
- 1 teaspoon fresh ginger, grated
- 2–4 tablespoons gochugaru (Korean chili flakes) — adjust to your spice preference
- 3 green onions, cut into 1-inch pieces
- 1 medium carrot, julienned (optional but recommended)
Where to find gochugaru: This is the most important ingredient and there’s no real substitute. Look for it at Asian grocery stores or order it online. It should be a vibrant red, coarse flake — not regular chili powder. I recommend the Taekyung Gochugaru 1lb — it’s 100% pure Korean red pepper flakes with no additives, MSG-free, and exactly what you need for authentic kimchi. It’s what I use and I always keep a bag in my pantry.
How to Make Kimchi Step by Step
Step 1: Salt the Cabbage (30 minutes to 2 hours)
Cut your napa cabbage into quarters lengthwise, then cut each quarter into roughly 2-inch pieces. Place the cabbage in a large bowl and sprinkle the salt over it, tossing to coat.
Massage the salt into the cabbage for a few minutes, then let it sit for at least 30 minutes (up to 2 hours). You’ll see the cabbage release a lot of liquid — this draws out moisture and begins to soften the leaves. Toss the cabbage every 30 minutes if you can.
Step 2: Rinse and Drain
After salting, rinse the cabbage thoroughly under cold water 2–3 times to remove excess salt. Taste a piece — it should be pleasantly salty but not overwhelmingly so. Squeeze out as much water as possible and set aside.
Step 3: Make the Kimchi Paste
Put on your rubber gloves — the chili paste will stain your hands and nails bright orange.
In a large bowl, combine the fish sauce, sugar, garlic, ginger, and gochugaru. Mix well until you have a thick, fragrant paste. Taste it — it should be spicy, garlicky, and slightly sweet.
Step 4: Combine Everything
Add the drained cabbage, green onions, and carrot to the bowl with the paste. Using your gloved hands, massage the paste thoroughly into every piece of cabbage. Make sure every leaf is evenly coated — this is the fun part!
Step 5: Pack Into Your Container
Pack the kimchi tightly into your E-Jen container or a clean glass jar, pressing down firmly so the vegetables are submerged in their own liquid. Leave about 1–2 inches of headspace at the top — kimchi expands as it ferments.
Step 6: Ferment at Room Temperature
Leave your kimchi out at room temperature (65–72°F / 18–22°C) for 1–5 days.
- After 1 day: Still fresh, mildly tangy
- After 2–3 days: Developing flavor, nicely sour
- After 4–5 days: Deeply fermented, very tangy and fizzy
Taste it every day and move it to the fridge when it reaches the flavor you love. Fermentation continues slowly in the fridge — most people enjoy kimchi most between 1 and 4 weeks of total fermentation.
How to Know When Fermentation Is Working
Bubbling: You’ll see small bubbles forming in the brine — this is carbon dioxide produced by the bacteria. It’s a great sign.
Tangy smell: After a day or two, your kimchi should smell distinctly sour and pungent. If it smells clean and fresh still, give it more time.
Pressing down: Each day, press down on the kimchi with a spoon or the E-Jen pressing plate to keep the vegetables submerged. This is especially important in the first 48 hours.
How to Use Your Kimchi
Once your kimchi is ready, the possibilities are endless:
- As a side dish — the traditional way, alongside rice and protein
- Kimchi fried rice — toss day-old rice with kimchi and a fried egg on top
- Kimchi grilled cheese — add a spoonful to your next grilled cheese sandwich
- Kimchi pancakes (kimchijeon) — a savory Korean pancake that uses kimchi as the main ingredient
- On top of ramen or noodles — adds incredible depth and heat
- As a gut-healthy snack — straight from the jar, eaten with chopsticks
Vegan Kimchi
Traditional kimchi contains fish sauce or salted shrimp. For a fully vegan version, simply substitute with:
- Soy sauce — equal amount, adds saltiness and umami
- Miso paste — adds depth and fermented flavor
- Seaweed powder or nori — adds an ocean-like umami note
The result is slightly different in flavor but equally delicious and just as probiotic-rich.
Troubleshooting Common Kimchi Problems
My kimchi isn’t fermenting / no bubbles The room may be too cold. Move it somewhere warmer and give it more time. If your kitchen is below 60°F / 15°C, fermentation will be very slow.
My kimchi is too salty You may not have rinsed the cabbage enough after salting. For future batches, rinse more thoroughly and taste the cabbage before adding the paste.
My kimchi is too spicy / not spicy enough Adjust the amount of gochugaru next time. Start with 2 tablespoons for mild, work up to 5–6 tablespoons for very spicy.
There’s liquid bubbling out of my jar This is completely normal — fermentation produces gas that pushes the brine up. Place your jar on a plate to catch any overflow, and make sure not to overfill your container.
White stuff on top If it’s a flat, powdery film it’s likely kahm yeast — harmless. Skim it off and ensure the kimchi is submerged. Fuzzy mold in other colors means something went wrong — discard and start fresh.
How Long Does Kimchi Last?
Properly made kimchi stored in the fridge will last for months — often 3 to 6 months or longer. The flavor continues to develop over time, becoming more sour and complex. Many Koreans actually prefer very aged kimchi (called mukeunji) for cooking.
Final Thoughts
Making kimchi at home is one of those things that sounds intimidating until you actually do it — and then you wonder why you waited so long. It’s messy, it’s fragrant, it’s deeply satisfying, and the result is a living, probiotic-rich food that no store-bought jar can compete with.
Your kitchen will smell like garlic and chili for a day. It’s absolutely worth it.
Start with a small batch, taste it every day, and see how it changes. That daily tasting ritual — that moment of connection with your food as it ferments and transforms — is exactly what Simple Root Life is about.
Welcome to the world of kimchi. 🌿
Here’s everything you need to get started:
- E-Jen Kimchi Container 0.9 gal (Best for most people) — vacuum seal lid, odor-proof, perfect size
- E-Jen Kimchi Container 1.7L (Beginner / small batch) — compact and easy to handle
- Mama O’s DIY Kimchi Kit (All ingredients included) — perfect for your very first batch
Made your first batch of kimchi? I’d love to hear how it went — drop a comment below and tell me how spicy you went!
